1.2 Creation of a Diffusion MR (DMR) Project

  1. The create project wizard can be found in the menu File -->
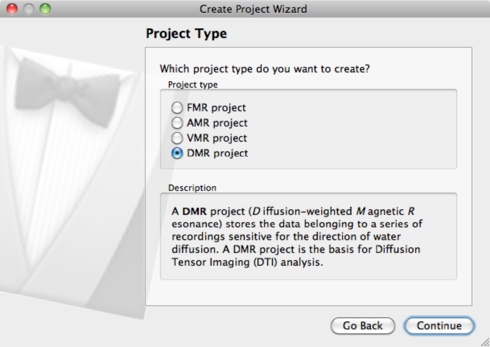
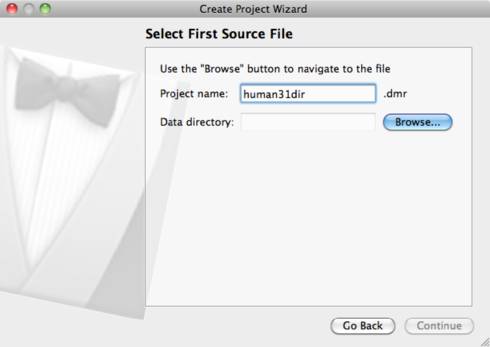
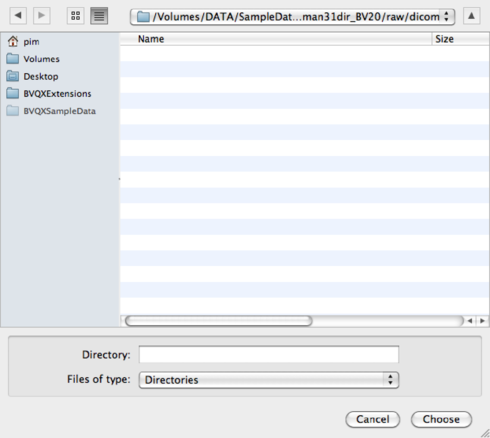
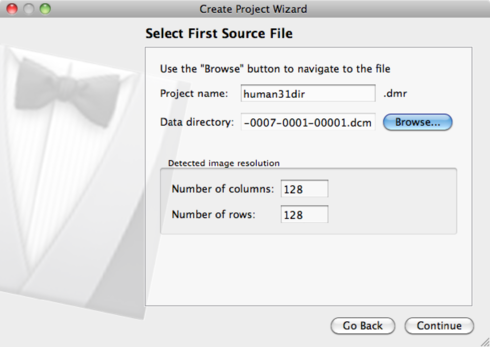
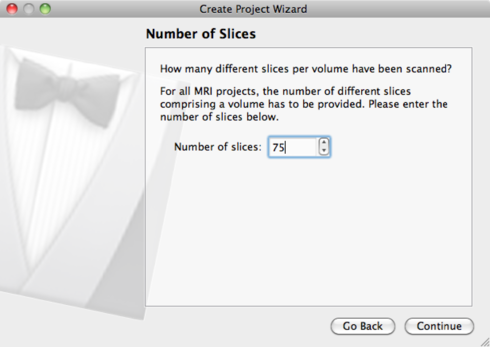
    Create Project Wizard.... A welcome window will appear, click Continue.
  2. Now it is time to specify the project type. Choose DMR Project.

    PIC

  3. Next step is to define the data type. In our case, this is Siemens DICOM, but Philips PAR/REC and ANALYZE are also supported. If you have Nifti data, please consult XXX.

    PIC

  4. Set the name of the DMR project to human31dir.dmr.

    PIC

  5. Click Browse to navigate to the directory containing the DICOM files. Note: in the browse window, the DICOM files will not be shown (the directory appears empty). So, you need to know where your DICOM files are, and select that specific directory.

    PIC

  6. In the next step, BrainVoyager will automatically show you the DICOM files belonging to several experiments you might have performed. Select the DICOM file belonging to the DW-MRI experiment pimpul_070907_dti -0007-0001-00001.dcm.

    PIC

    PIC

  7. Enter the number of slices (75) and the number of volumes (31 = number of diffusion directions) in the next two windows.

    PIC PIC

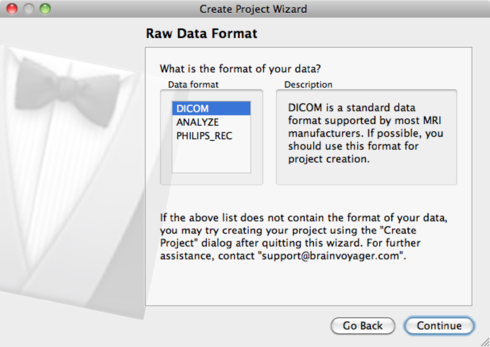
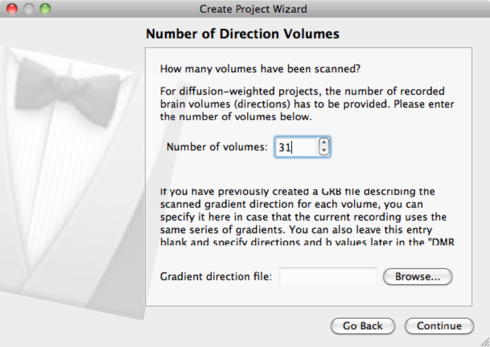
    If you already have a gradient file, you can attach it during this stage of the project definition. Use the Browse button to locate the file mgh_dti30.grb. See section 1.6.1 for details on the file format and contents. Otherwise, leave the field blank and continue by clicking Next.

  8. BrainVoyager will now give you a summary of the project. Please take a moment to check whether everything is correct. Otherwise, you can use the Back button to redo a step.

    PIC

  9. Click Finish to start the DMR Project creation.

1.2.1 DMR Properties

After the project is finished, the DMR Properties dialog pops up.

PIC

You can inspect here if BrainVoyager has taken the correct parameters of the data.

General information

Nr of slices

Nr of volumes

should be identical to nr of diffusion directions

DWI storage format

For internal use

Voxel Resolution definition

X, Y, Z resolution

please check if correct (2 × 2 × 2mm)

Gap thickness

should be 0

Options

allows you to change in-plane resolution

Temporal Resolution, slice timing

Check for accuracy:

TR

8900

TE

78

Check Verified

Refence inplane (coplanar) AMR file

should be automatically filled, otherwise use Browse to point to AMR.

DWI data

allows you to do calculations on the DMR. Will be discussed later in section1.3.1

Options

opens the options dialog, allows you to change the DWI file prefix and nr of skipped volumes (should be 0 normally)