Including EPI distortion correction in Workflow
- Details
- Category: Pre-Processing
- Last Updated: 07 March 2022
- Published: 09 April 2018
- Hits: 3465
In BrainVoyager 20, the creation of projects, pre-processing of projects, coregistration, normalisation and statistics can all be automated via the Data Analysis Manager in BrainVoyager 20. Since the pre-processing option 'EPI distortion correction', the correction for susceptibility artifacts, is only available as plugins (anatabacus for field-map based correction and COPE for image registration-based correction), this option cannot be chosen in the Preprocessing Workflow.The current document shows how to include EPI distortion correction in the Preprocessing Workflow.
First, create and run any required Create Document and Preprocessing Workflows for the functional data (also anatomical data, if registration of a fieldmap to the anatomy is required). In this example, we have created FMR files and applied slice scan time correction and motion correction.Any spatial smoothing should be applied after EPI distortion correction.

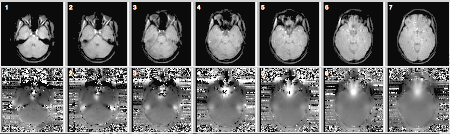
Now run the anatabacus 1.1.0 or COPE 1.0 plugin via the BrainVoyager "Plugins" menu. For now, we run anatabacus, because for this project we have phase and magnitude images for each subject.
The magnitude and phase map data can be located anywhere, but the EPI data have to come from the Data Analysis Manager Project folder, so that the distortion corrected FMR file will be available in the Project as well.
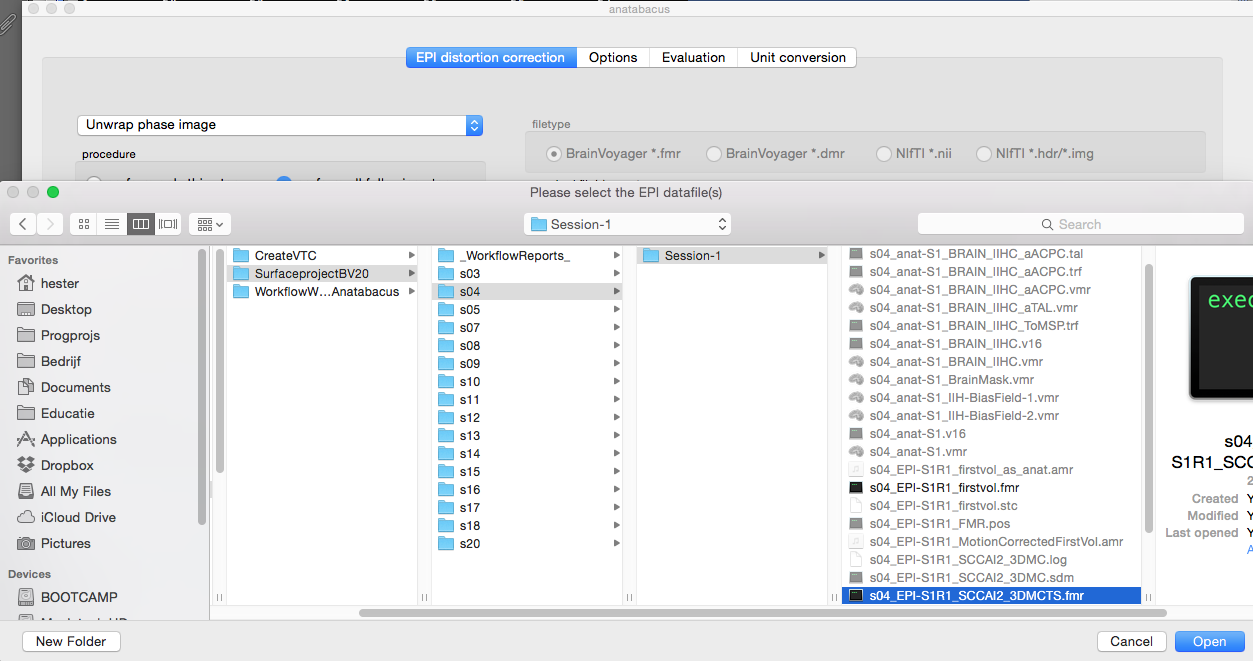
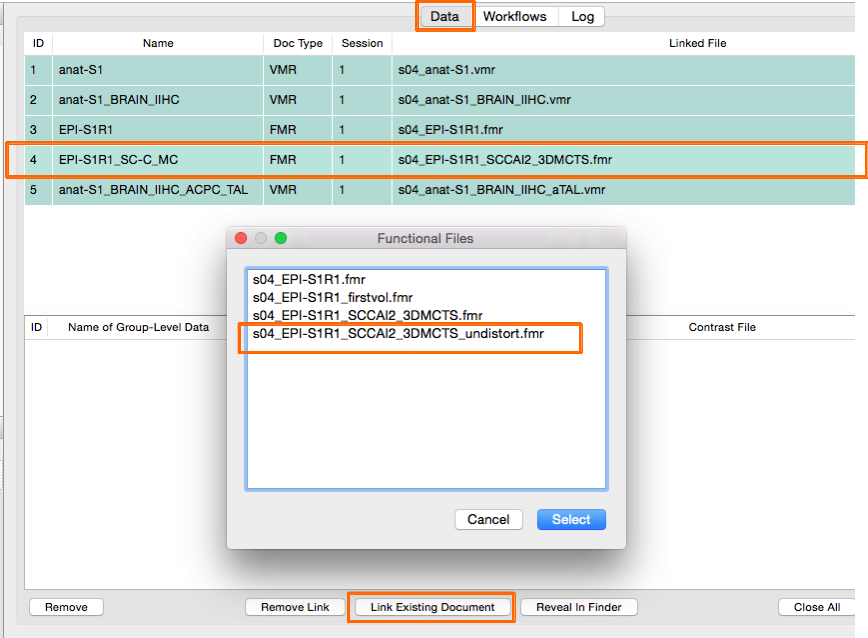
In this project, the experiment name for the functional data is EPI-S1R1_SC-C_MC and the linked file for this subject is s04_EPI-S1R1_SCCAI2_3DMCTS.fmr. Select the motion-corrected EPI file (*.fmr) on the Data tab and click the button 'Link Existing Document' (see picture below). We have performed EPI distortion correction with anatabacus, which creates a file with suffix *_undistort.fmr in the same folder. Click on this file and the Select button.
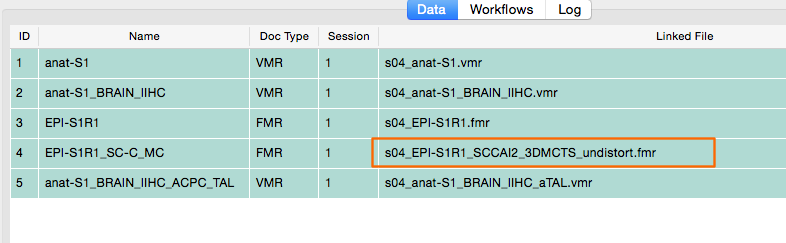
The functional file in the Data tab now refers to the undistorted FMR for subject 4.
Repeat this for all subjects in the project. After this, spatial smoothing could be applied, if required, and coregistration, normalisation and statistical workflows can be run.
Note March 2022: Workaround for including undistorted EPI data in the Data Analysis Manager of BrainVoyager 22.2: PDF.